How to Make a Miniature Pond in Five Easy Steps
It’s fair to say that the current times have taught us a lot of things and just one of those is that it’s important, more now than ever that we make the most of our outside spaces at school and at home. As an added bonus, if we’re able to get creative within our outside space, it will have a positive impact on our children’s (and our own) mental health as well as a it being a great learning tool and quite simply enjoyable.
With most shops closed and with everyone staying at home to #StaySafe, I’ve noticed that we have become so much better at reusing items that may have otherwise ended up at the recycling centre. It’s a pleasant surprise to see what you can create from what you already have hiding away in storage.
Something that you may be able to make from what you already have laying around, is a miniature pond! Now, not only will this be a great lesson for children, it will be enjoyable and rewarding to create and you will be building a home for wildlife such as newts, frogs and toads.
So, what do I need to create a miniature pond?
The items can vary and there’s no strict rules, it’s your pond after all however, here’s the basics:
- A large shovel
- A large washing up tub, old butler sink or similar – Something that will not crack in the winter from the cold as you want it to last year after year
- Gravel – Aquarium gravel is preferred however, any small gravel should work just as well
- Large stones, rocks, bricks or similar – To create a step for wildlife to easily get out
- Aquatic plants – These are needed to keep the pond water clean so you don’t need any electronic pumps – parents may have some spare plants in their ponds that they could donate
- Rainwater – to fill the pond, if you only have tap water, leave it in a bucket for a couple of days to remove the chlorine.
How long will it take me to build a miniature pond?
Around 2-3 hours depending on how many little hands you have helping you.
Okay, now how do I build the miniature pond?
- Measure the size of your chosen tub and dig a hole in the ground so it fits in perfectly, then place your tub in the hole.
Tip: If you’re using a butler sink, be sure to fill and seal the drainage holes to ensure they’ll be no leakage. Likewise, you will need a tub that doesn’t have any cracks. - Place a thin layer of gravel in the bottom of the tub.
- Place your large stones or bricks along one side of the tub so that it creates a staircase or slope for wildlife to get out if they fall in.
- Fill the tub with rainwater.
Tip: If you don’t have any rainwater to hand, you can fill some buckets with tap water and leave them outside for a couple of days to naturally remove the chlorine - Place your aquatic plants in the water in your chosen places and hey presto, you’ve built a pond!
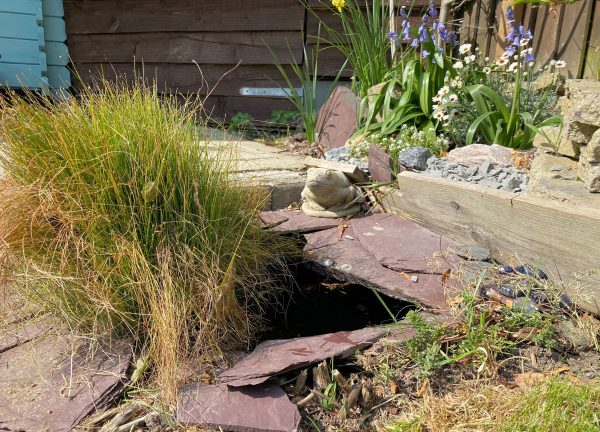
The image shows a pond that I made around four years ago using an old butler sink that was saved from a skip. So, as you can see, if you look after your pond it will last a long time and create a home for an abundance of wildlife.
Download our how to get the most out of your canopy guide for more great outdoor learning and play ideas that can be enjoyed under your school canopy:

Able Canopies Ltd. design, manufacture and install canopies and shade structures
at schools, nurseries and educational settings to enable year-round
Free Flow Outdoor Play and Outdoor Learning.
For more information please contact us
Follow us on our social media accounts for the latest funding advice, new products & latest news:
Twitter | Facebook | Linked In
Categories
- Canopies for Architects & Contractors
- Canopies for Healthcare
- Canopies for Restaurants, Bars and Hotels
- Canopies for Retail & Commercial
- Canopies for Schools
- Canopies for Sports & Leisure
- Canopy Maintenance
- Case Studies
- Cool Links & Facts
- Cycle Parking Solutions
- Dates for Your Diary
- Eco-Friendly Holiday Crafts
- Employee Spotlight
- Environmental Tips
- Funding and Fundraising
- How to... Get the Most out of Your Canopy
- Latest News
- Latest Stories
- Lockdown Outdoor Learning & Play Ideas
- MD News
- Newsletters - Architects & Contractors
- Newsletters - Schools & EYFS
- Outdoor Learning
- Outdoor Play
- Planning Your Cycle Parking
- Product Focus
- Solar Carports
- Spring Fundraisers 2017
- Summer Shade
- The Good Canopy Guide
- Wall Mounted Canopies